Making a dumb lamp smart
Published 23rd Mar 2026 · 8 min read · #home automation#electronics#homeassistant#sonoff#3d printingtl;dr: I designed and 3d printed a new housing for an ikea lamp footswitch in order to fit a zigbee adapter inside. model here
Since moving into our new house, the lack of interior decorating has been slowly starting to irritate me more and more, so this year our focus at home has been on decorating the place and making it into a more livable space.
Since Ikea just opened here, we figured it would be a good place to start without blowing out the budget. 1
After spending way too much time and money at Ikea we came home with this bad boy: the Ikea Strandad floor lamp. We took it home and set it up and were admiring it when I noticed the switch to turn it on. It looks something like this:
 I immediately started thinking… hmm, that looks about the same size as a Sonoff Mini… Could I just… jam one in there? Make the switch smart while keeping the manually operated footswitch?
Well yes, but actually no
I grabbed one from aliexpress and measured it against the switch and it definitely looked like the footprint could fit inside. Eyeball test passed, I set about figuring out how I could actually make it fit in the footprint of the existing switch housing.
Dissassembling the switch showed me that there was absolutely no way I could just somehow jam the sonoff in, since despite the flat footprint being the right size, the vertical size of the sonoff was far too large, which I thought was probably going to be the case.
The inside of the case is pretty sparse. There’s a platform that holds the switch assembly in place, plus mounting posts for the screws that hold the top and bottom together. So inspecting the interior showed that I would need to somehow add some vertical space if I wanted to fit anything taller than a piece of paper inside.
I set out on the project with 2 main goals:
- keep the manual footswitch. While it would be much easier to just find a sonoff case on makerworld and replace the switch entirely, having to pull out your phone just to turn on the lamp you’re standing next to seemed dumb, if we have a choice.
- don’t require any extra parts. I always appreciate projects that don’t have a massive BOM you need to buy before you can start, so I thought it would be cool if we could build this without needing to find any extra hardware like screws. Well, except the 3d printer. Since the switch comes with 4 screws holding the 2 pieces together, we already have the hardware we would need, if we can integrate it properly.
The idea
So now we had a goal, and a rough plan… How to actually do it?
Because I wanted to keep the manual footswitch, I figured it would be easiest to keep the existing case and insert a new 3d printed piece in the middle to extend the height of the switch juuuuuust enough to fit in the sonoff without making a giant tower that you need a stool to step on.
I would first need to model the extension with interface points for the existing switch screw holes. I could then use 2 of the screws to attach the top piece of the switch to the extension and the remaining 2 screws to attach the bottom.
If you’re wondering how you can attach screws through the sonoff while keeping the mounting points for the bottom… excellent question, which will be addressed after massively overcomplicating the first design.
Skip to the final product if you don’t care about the first, failed attempt.
First attempt
The first step was to measure the inside of the footswitch to get the size and placement of the screws and supports, which we would need to take into account with the model to ensure that everything fit back together once we had printed out the middle insert.
With a basic idea of what I wanted and the measurements in hand, I set to designing. I fired up Fusion and started designing a middle piece to slot between the top and bottom of the Ikea switch. I very quickly realized that you can’t install screws from both the top and the bottom while still having a bottom attachment point to screw into.
This threw me for a while. I am very much a beginner at designing stuff like this, so my first solution was to split the middle piece into an inner and outer shell in an attempt to make it easier to attach the bottom piece to the top.
This took a long time and ended up being a bad idea; more complex, less secure and took up twice as much material to print.
N-th attempt
I went through a few different revisions of this design before I gave up on it. I tried playing around with how the screws would attach, and shifting the material around to make it connect better. I did manage to refine it down to something that would have worked, except for the inherent issues with 3d printing.
Because the printed layers are weak to forces applied in the opposite direction, designing a solid attachment point for the screws was very difficult. The mount points tended to pop up when pressure was applied when screwing in a screw. Additionally, the PLA plastic filament I’m using is quite soft, so even if the screws managed to screw in without immediately breaking the mount, they would chew up the insides after a few turns, or just be too weak to provide any proper holding strength.
Typically when adding screws, you would use a heat set insert - a small brass fitting that you melt into the model using a soldering iron that provides a solid attachment point for screws and then use a standard M3 or something screw. While this probably would have worked, my goal with this project was to be completely drop-in with the ikea hardware, and not require any extra parts besides what came with the lamp and something that you can 3d print. So requiring the heat-set inserts and extra screws was out.
Final design
After failing for a while with my stupid split piece design, I eventually realized that I didn’t actually need the stock bottom plastic piece at all. Removing it and replacing it with a 3d printed lid that screws or clips in would remove the need for the bottom screws and simplify the whole thing.
So I hit youtube for ideas on how to design a 3d printed screw-in lid and put together a better design that used a screw on design to attach the bottom piece.
I also added a little inverted platform thingy so that you can add a ziptie to hold the sonoff in place on the roof of the case, which makes it easier to install in place. This also made the whole case much smaller and easier to work in, and is what I should have done from the start. I’m sure an experienced designer could have come up with something more elegant (and faster), but it does the job and doesn’t look terrible.
So I ended up with 2 pieces: the main body that the top cone part of the switch attaches to via the original screws, then a bottom lid that slots into the main body to hide the internals.
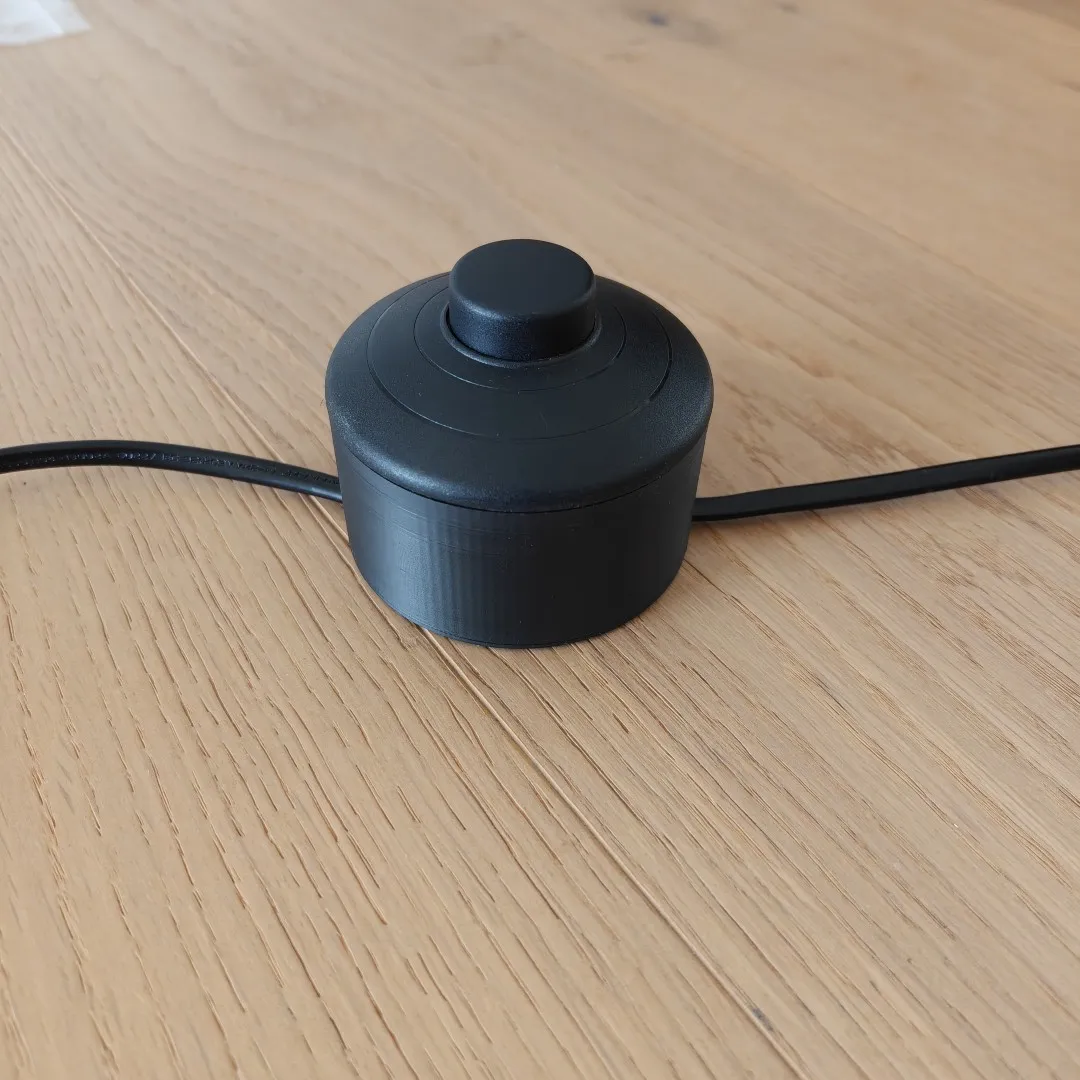
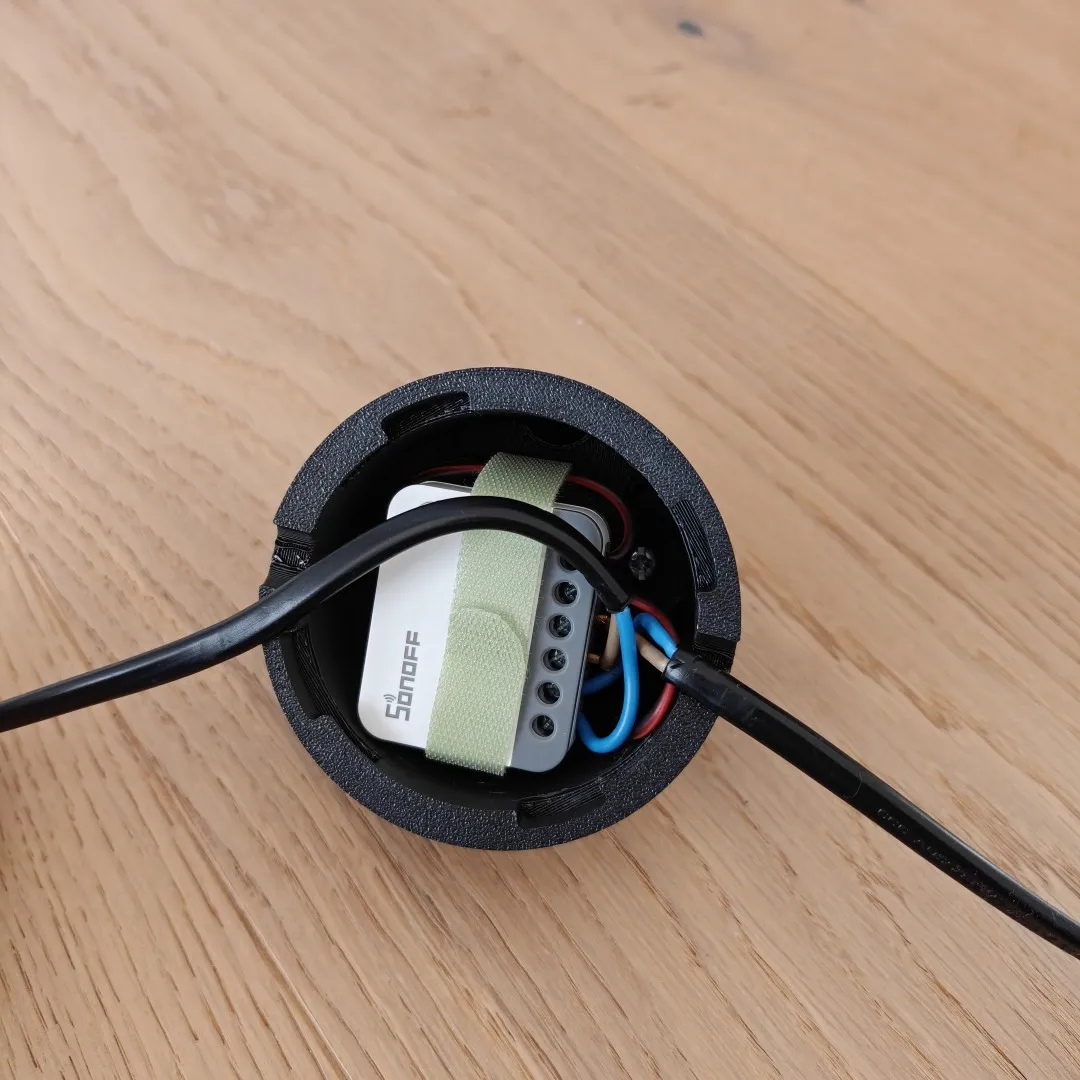
You can find the model on makerworld here
Assembly and testing
With the case piece printed, we can finally move on to assembly. After the rigamarole of designing the case, assembly was pretty straightforward. Thread a ziptie through the hole, secure the sonoff in place. Then feed the switch wires through the holes and screw the top switch piece in. Finally, connect up all the wires to the correct ports on the sonoff and screw in the bottom piece. Done!
Well, first plug it in and connect the sonoff to the zigbee network and test the switch. Zigbee2mqtt lets you control the settings on the sonoff, so you can set the switch to toggle the light when pressed. Done!
Electricity is dangerous yo
Standard warnings about electricity apply here; ensure that you unplug everything before you try to connect up any wires. This is especially dangerous since it used raw AC. Be VERY careful with exposed wires
Final thoughts
This little project was a fun way for me to learn more about designing things in fusion, and prototyping physical products. As a software guy it took a bit of getting used to, but was very rewarding to struggle through and see the end result.
I learned a lot more about how to use fusion to prototype a design and iterate through different options to find something that works.
Footnotes
-
Of course, anyone who’s been to Ikea knows, this never goes to plan. Aren’t they meant to be a budget option? ↩