Smartifying my garage door
Published 3rd Jul 2024 · 12 min read · #home automation#electronics#home assistant#shellyI’ve wanted to learn more about circuits and electricity for years, but i’ve never had a good enough reason to learn more about it. Building toy circuits to turn on an LED never really appealed to me and could never hold my interest past the intro videos. I needed something more practical, something that I could actually use for real day to day. So when I saw a youtube video about converting a dumb remote operated garage door to be smart, I was intrigued.
I was already running homeassistant at this point, so I was already familiar with the basics of home automation and all the cool things you could do with it.
I am also fundamentally pretty lazy, so not having to manually open my door when I arrive home was pretty appealing to me. Converting my dumb electric garage door opener to be a smart one seemed like a great way to satisfy some of that curiosity about electrical circuits, while also indulging my laziness, and letting me add a new device to the growing chaos ecosystem of my smart home.
After watching the video a few times, it seemed simple enough - so I decided to give it a bash.
This post will detail how I went about converting my garage door to be smart, and the automations I’m using in home assistant to make it work. It’s intended for someone who has never worked with electronics before; please feel free to skip over the boring parts if you’re already familiar with the basics.
Overview
The basic idea behind the project involves adding a relay to the garage door opener (GDO) which can be connected into your smart home control software of choice. A relay is a simple switch that toggles between ‘open’ and ‘closed’ states. You can think of it like a light switch that you can control via a circuit. The relay i’ll be using (a Shelly 1) is able to toggle via wifi which is perfect for home automation. 1
Once the relay is attached, you can toggle the GDO open and closed via the relay, which means you can open and close the door from your phone, or set up automations to open the door when you arrive home, or close it when you leave. The Shelly also has a switch input which you can use to detect the state of the door, so you can tell if the door is open or closed at any time.
To detect if the door is open or closed, we use a magnetic reed switch. This is basically a small piece of wire that is affected by a nearby magnet. When the magnet comes close, it connects the circuit and the relay can detect that the door is closed. When the magnet is far away, the circuit is broken and the relay can detect that the door is open. We can connect the switch to the Shelly, then place a magnet on the door to determine the closed state of the door.
Will it blend?
After researching relays, namely learning what they are and how to buy one, I decided that in order to continue with the integrating one the first thing I needed to work out was if I could actually trigger the GDO without a remote or the wall switch. If I couldn’t then this whole thing was dead in the water before I even started and I should just go back to opening the door with a remote like a pleb.
My garage door is thankfully not made by Chamberlain 2, it’s a simple ‘old style’ model which i’m pretty sure is the exact same as every other one made before the year 2000 which has been rebranded.
Because my GDO is old style, it triggers an open or close action by shorting two contacts on the main circuit board. In fact, this is all hitting the wall switch does in this case. In order to find the correct contacts on the opener I had to first take it apart, then trace the wire running into the unit from the wall switch. After unscrewing the casing I was greeted with this sight:
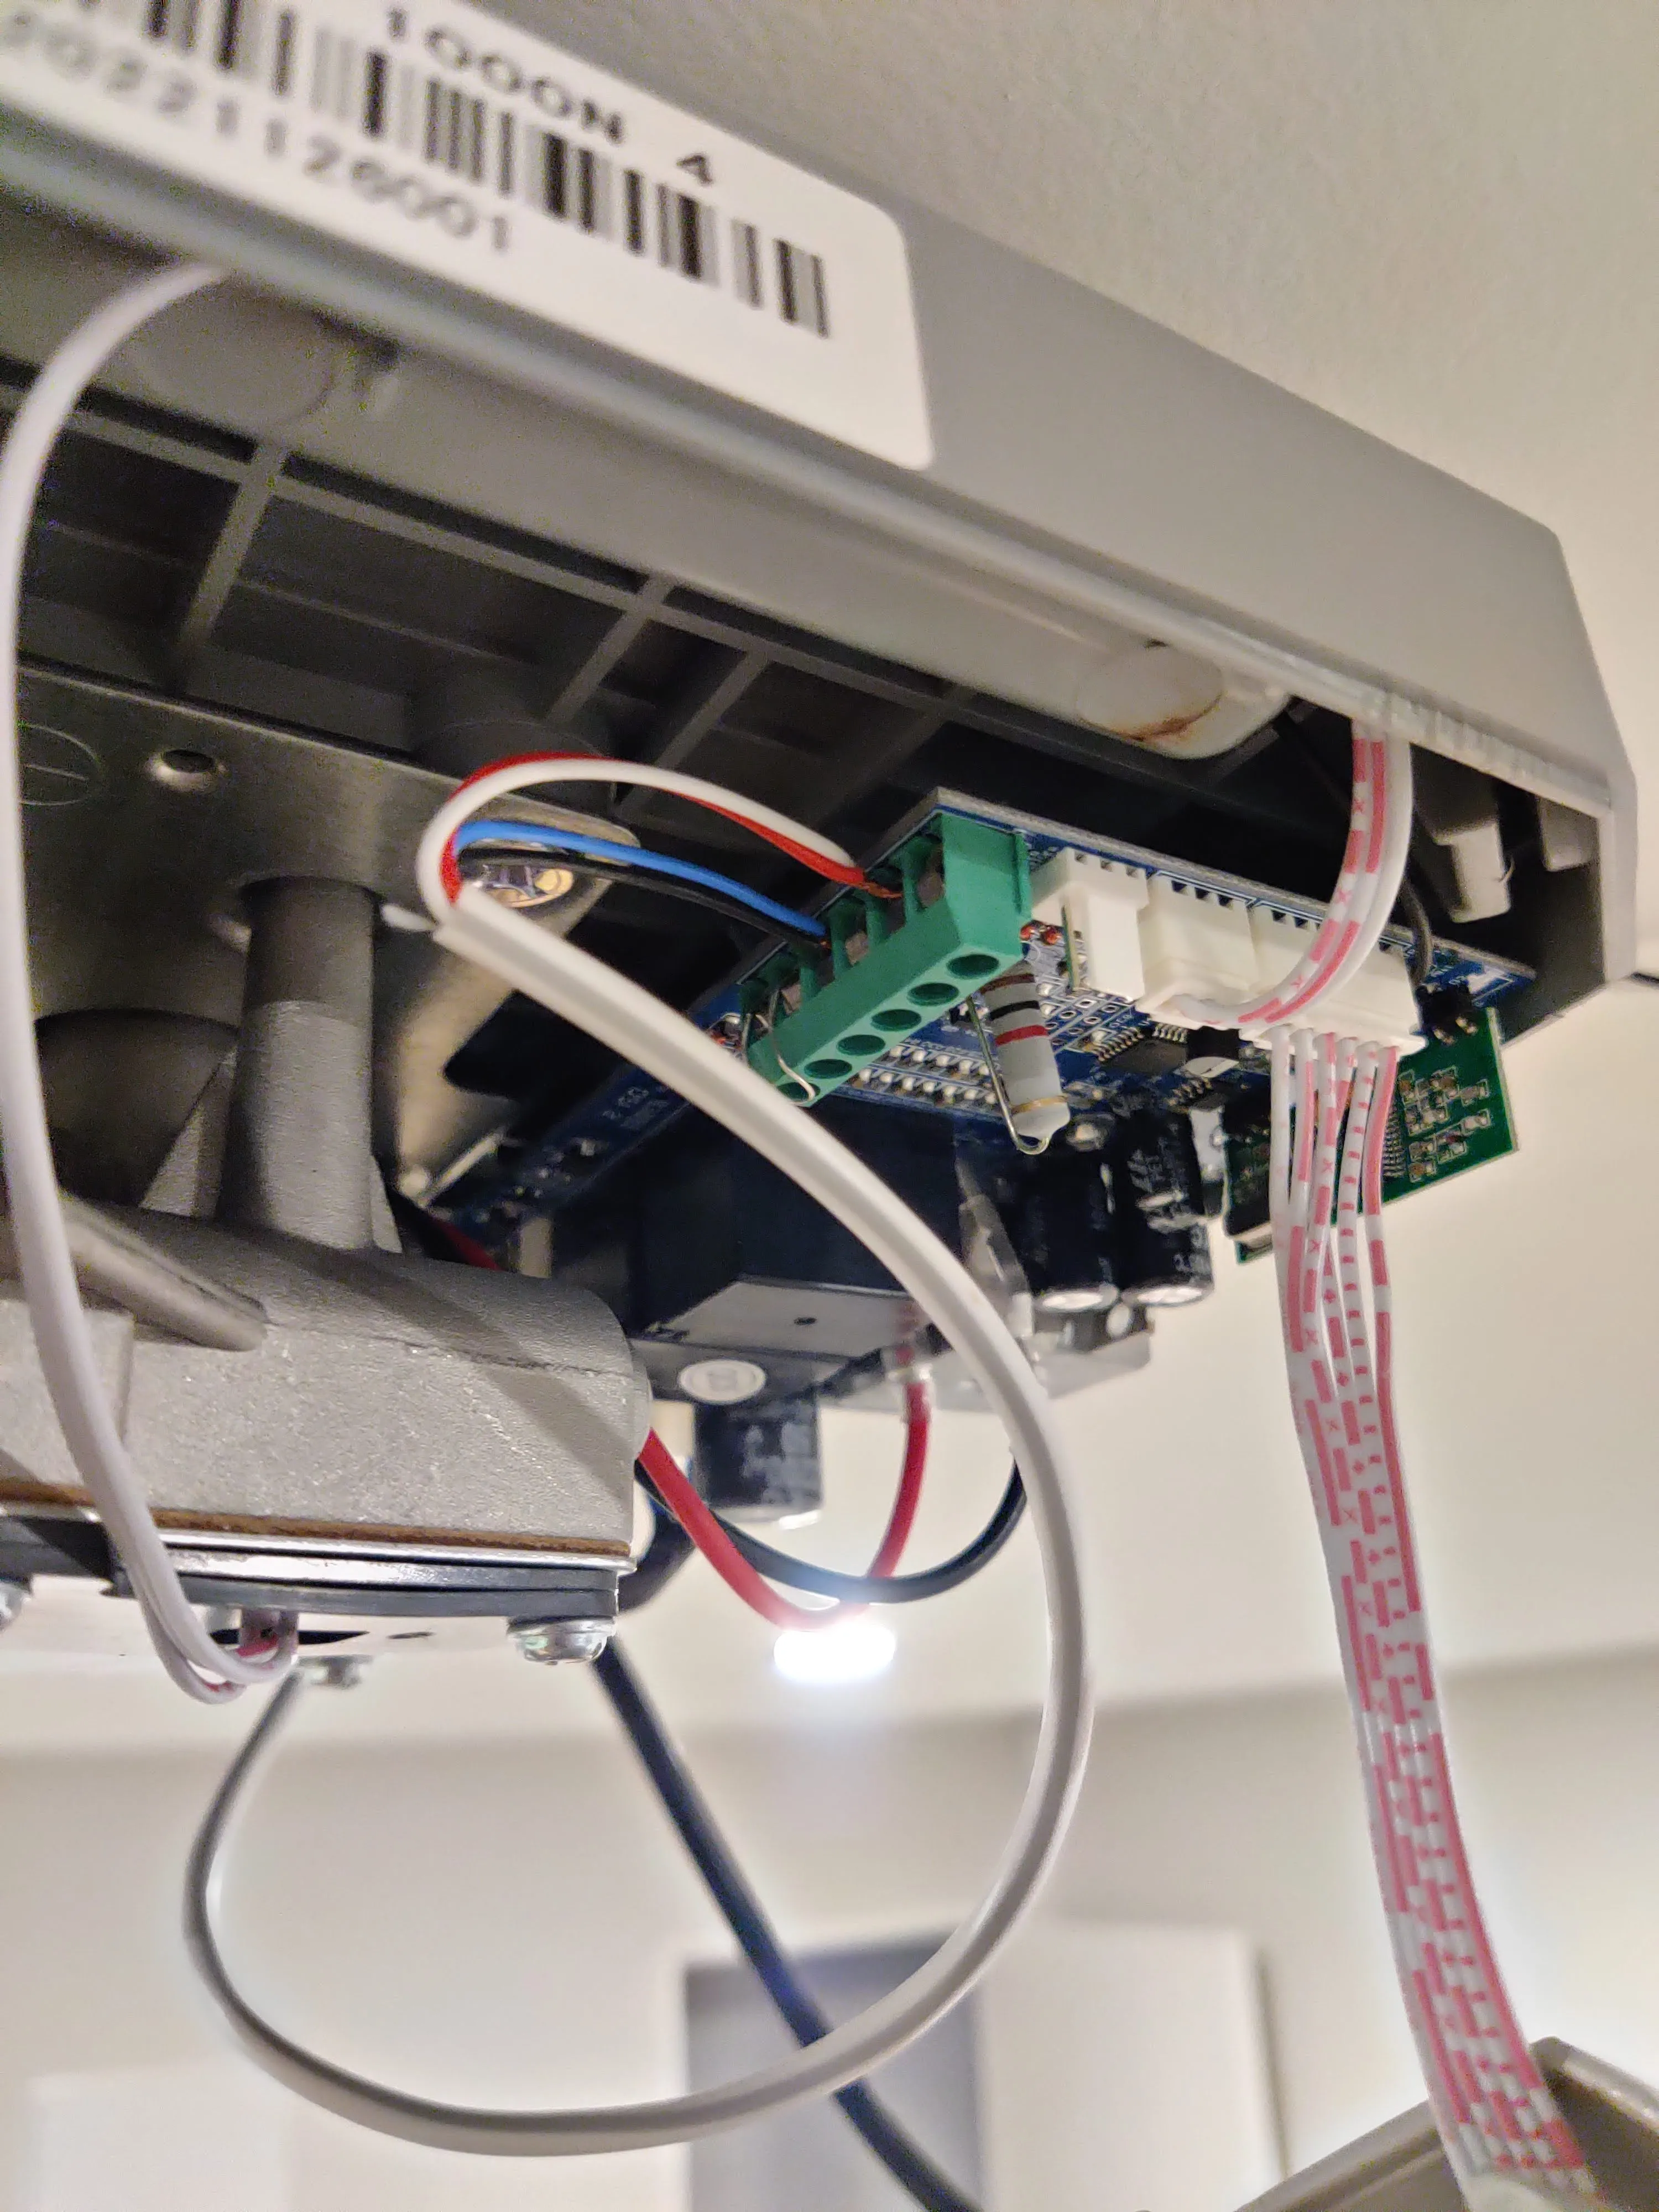
As you can see, there is a white wire running into the GDO main circuit board is attached to two screw terminals. The other end of this wire goes through the roof and connects in to the wall switch. To test out if I would be able to manually control the door, I (very carefully) shorted the two terminals with a piece of (insulated) wire connecting to each terminal and the door opened! Success, which meant that I could move on to part 2 - wiring in a relay.
Prepping
Satisfied that everything would work in theory, I went ahead and ordered the things I would need to complete the project. Once they all arrived I decided to ‘breadboard’ it and test everything before going through the effort of the install.
So I cut the end off of the 12v adapter and exposed the ends of the postive and negative wires, and screwed them in the correct terminals on the Shelly according to the manual for 12v DC power. (Which was 12v+ and L terminals for the Shelly Plus 1).3
I then connected one wire from the reed switch to the SW terminal, and the other end to the L terminal and placed the magnet close to the switch.
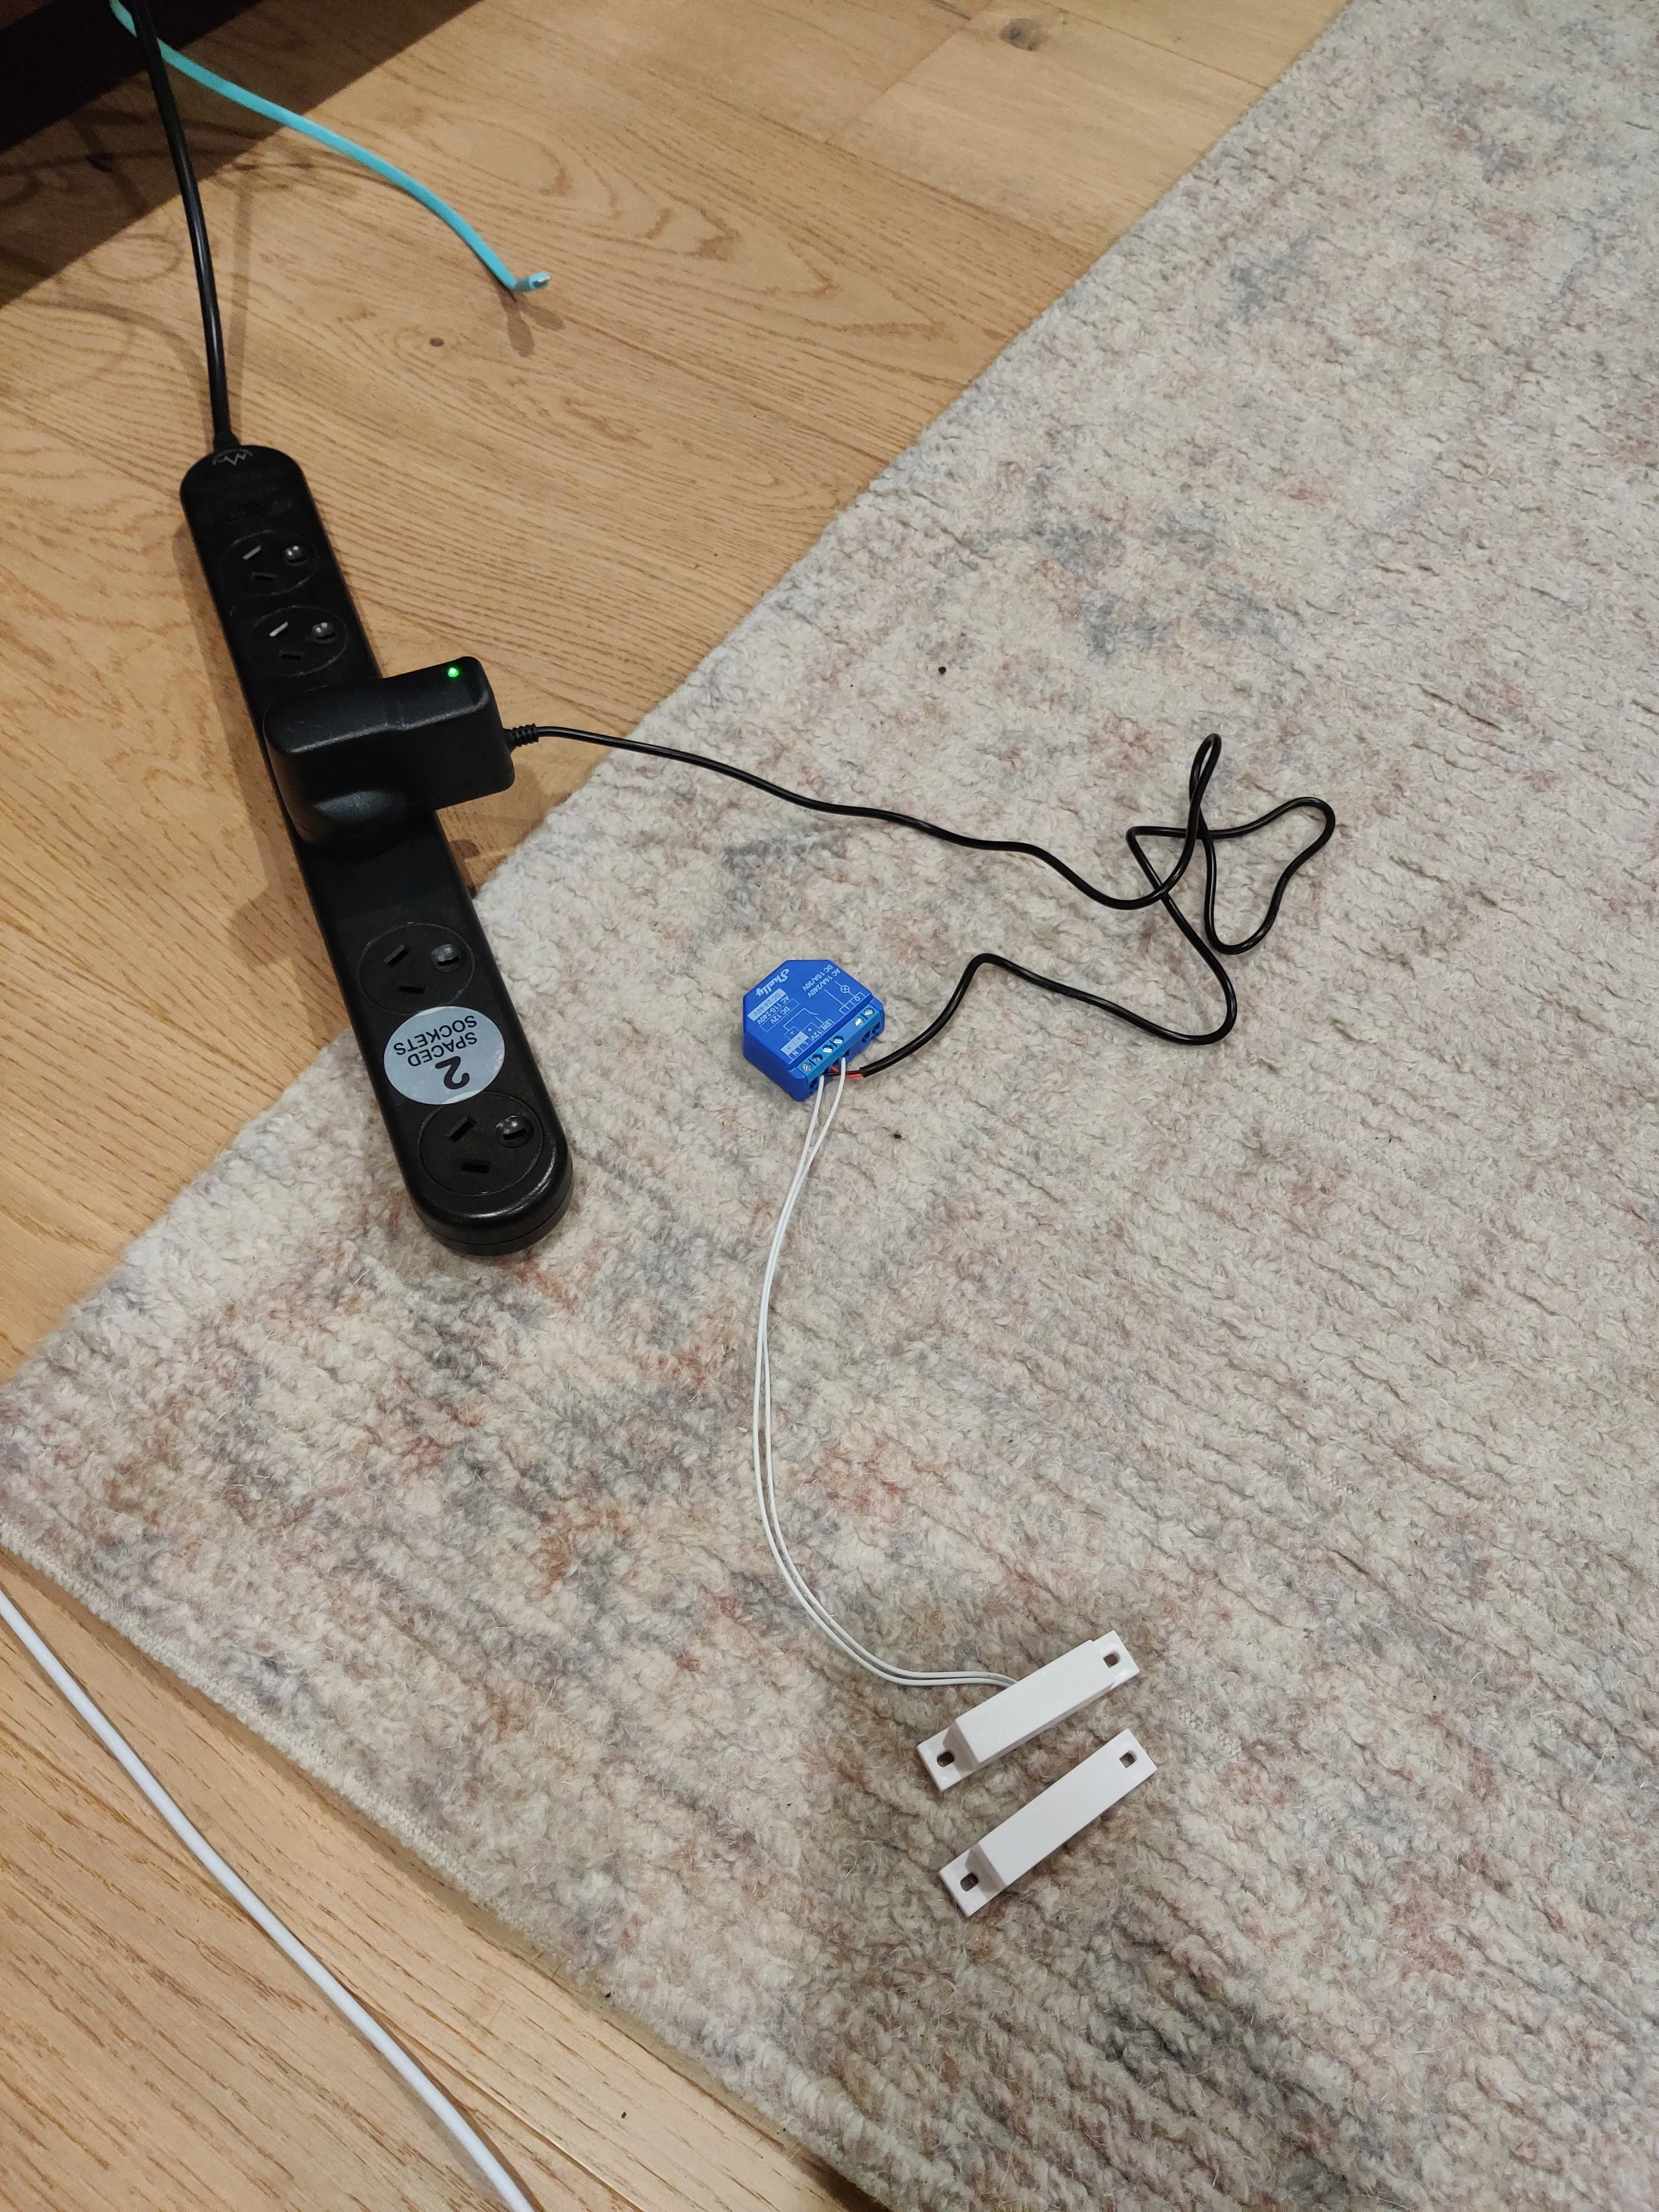
Once everything was screwed in to the correct place, I plugged it in, crossed my fingers and hoped nothing was about to explode. Happily, everything seemed to work perfectly! Opening the Shelly app, I could see the new relay and get it up and running. I could successfully toggle the relay opened and closed (which makes a satisfying ‘clunk’ sound each time) and verified that the reed switch was working. I had to set the switch to ‘Detached’ mode so that the switch wouldn’t auto trigger the relay.
Since it all seemed to be working, it was time to install everything on the door itself.
Installing on the door
This part should have been straightforward, but ended up taking a long time because its hard to attach tiny wires with your hands held above your head while all the blood drains out of your arms.
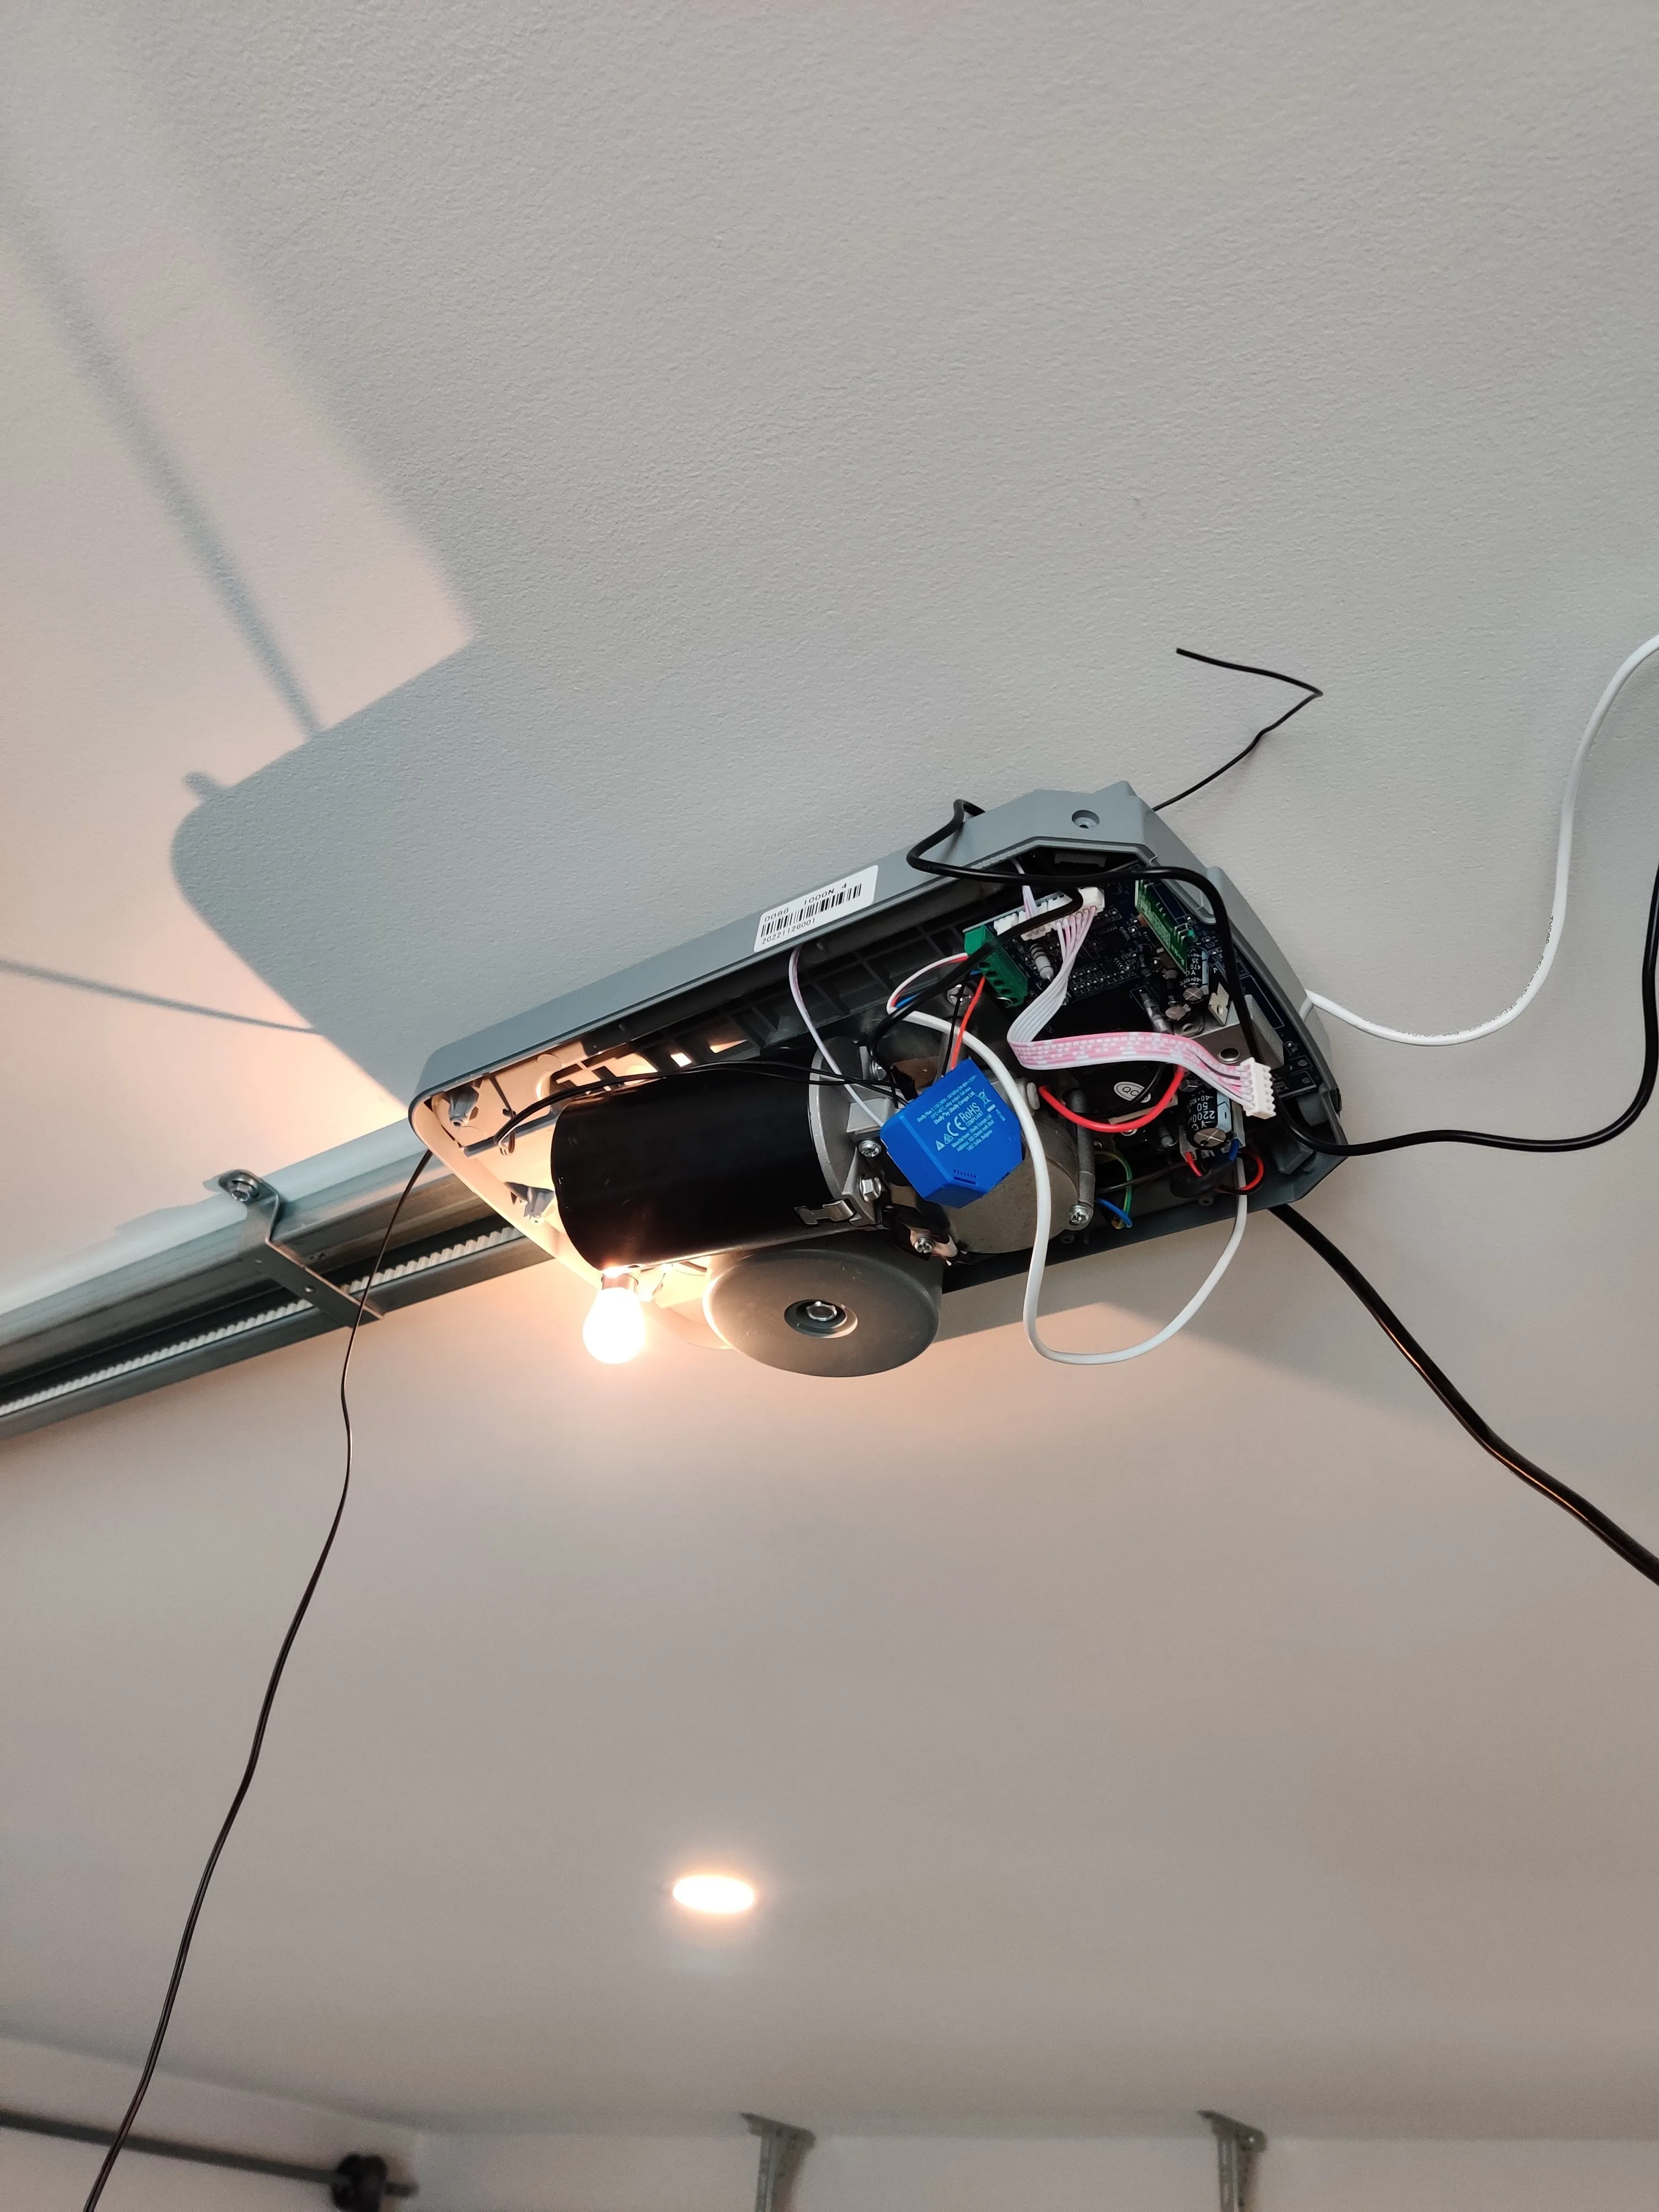
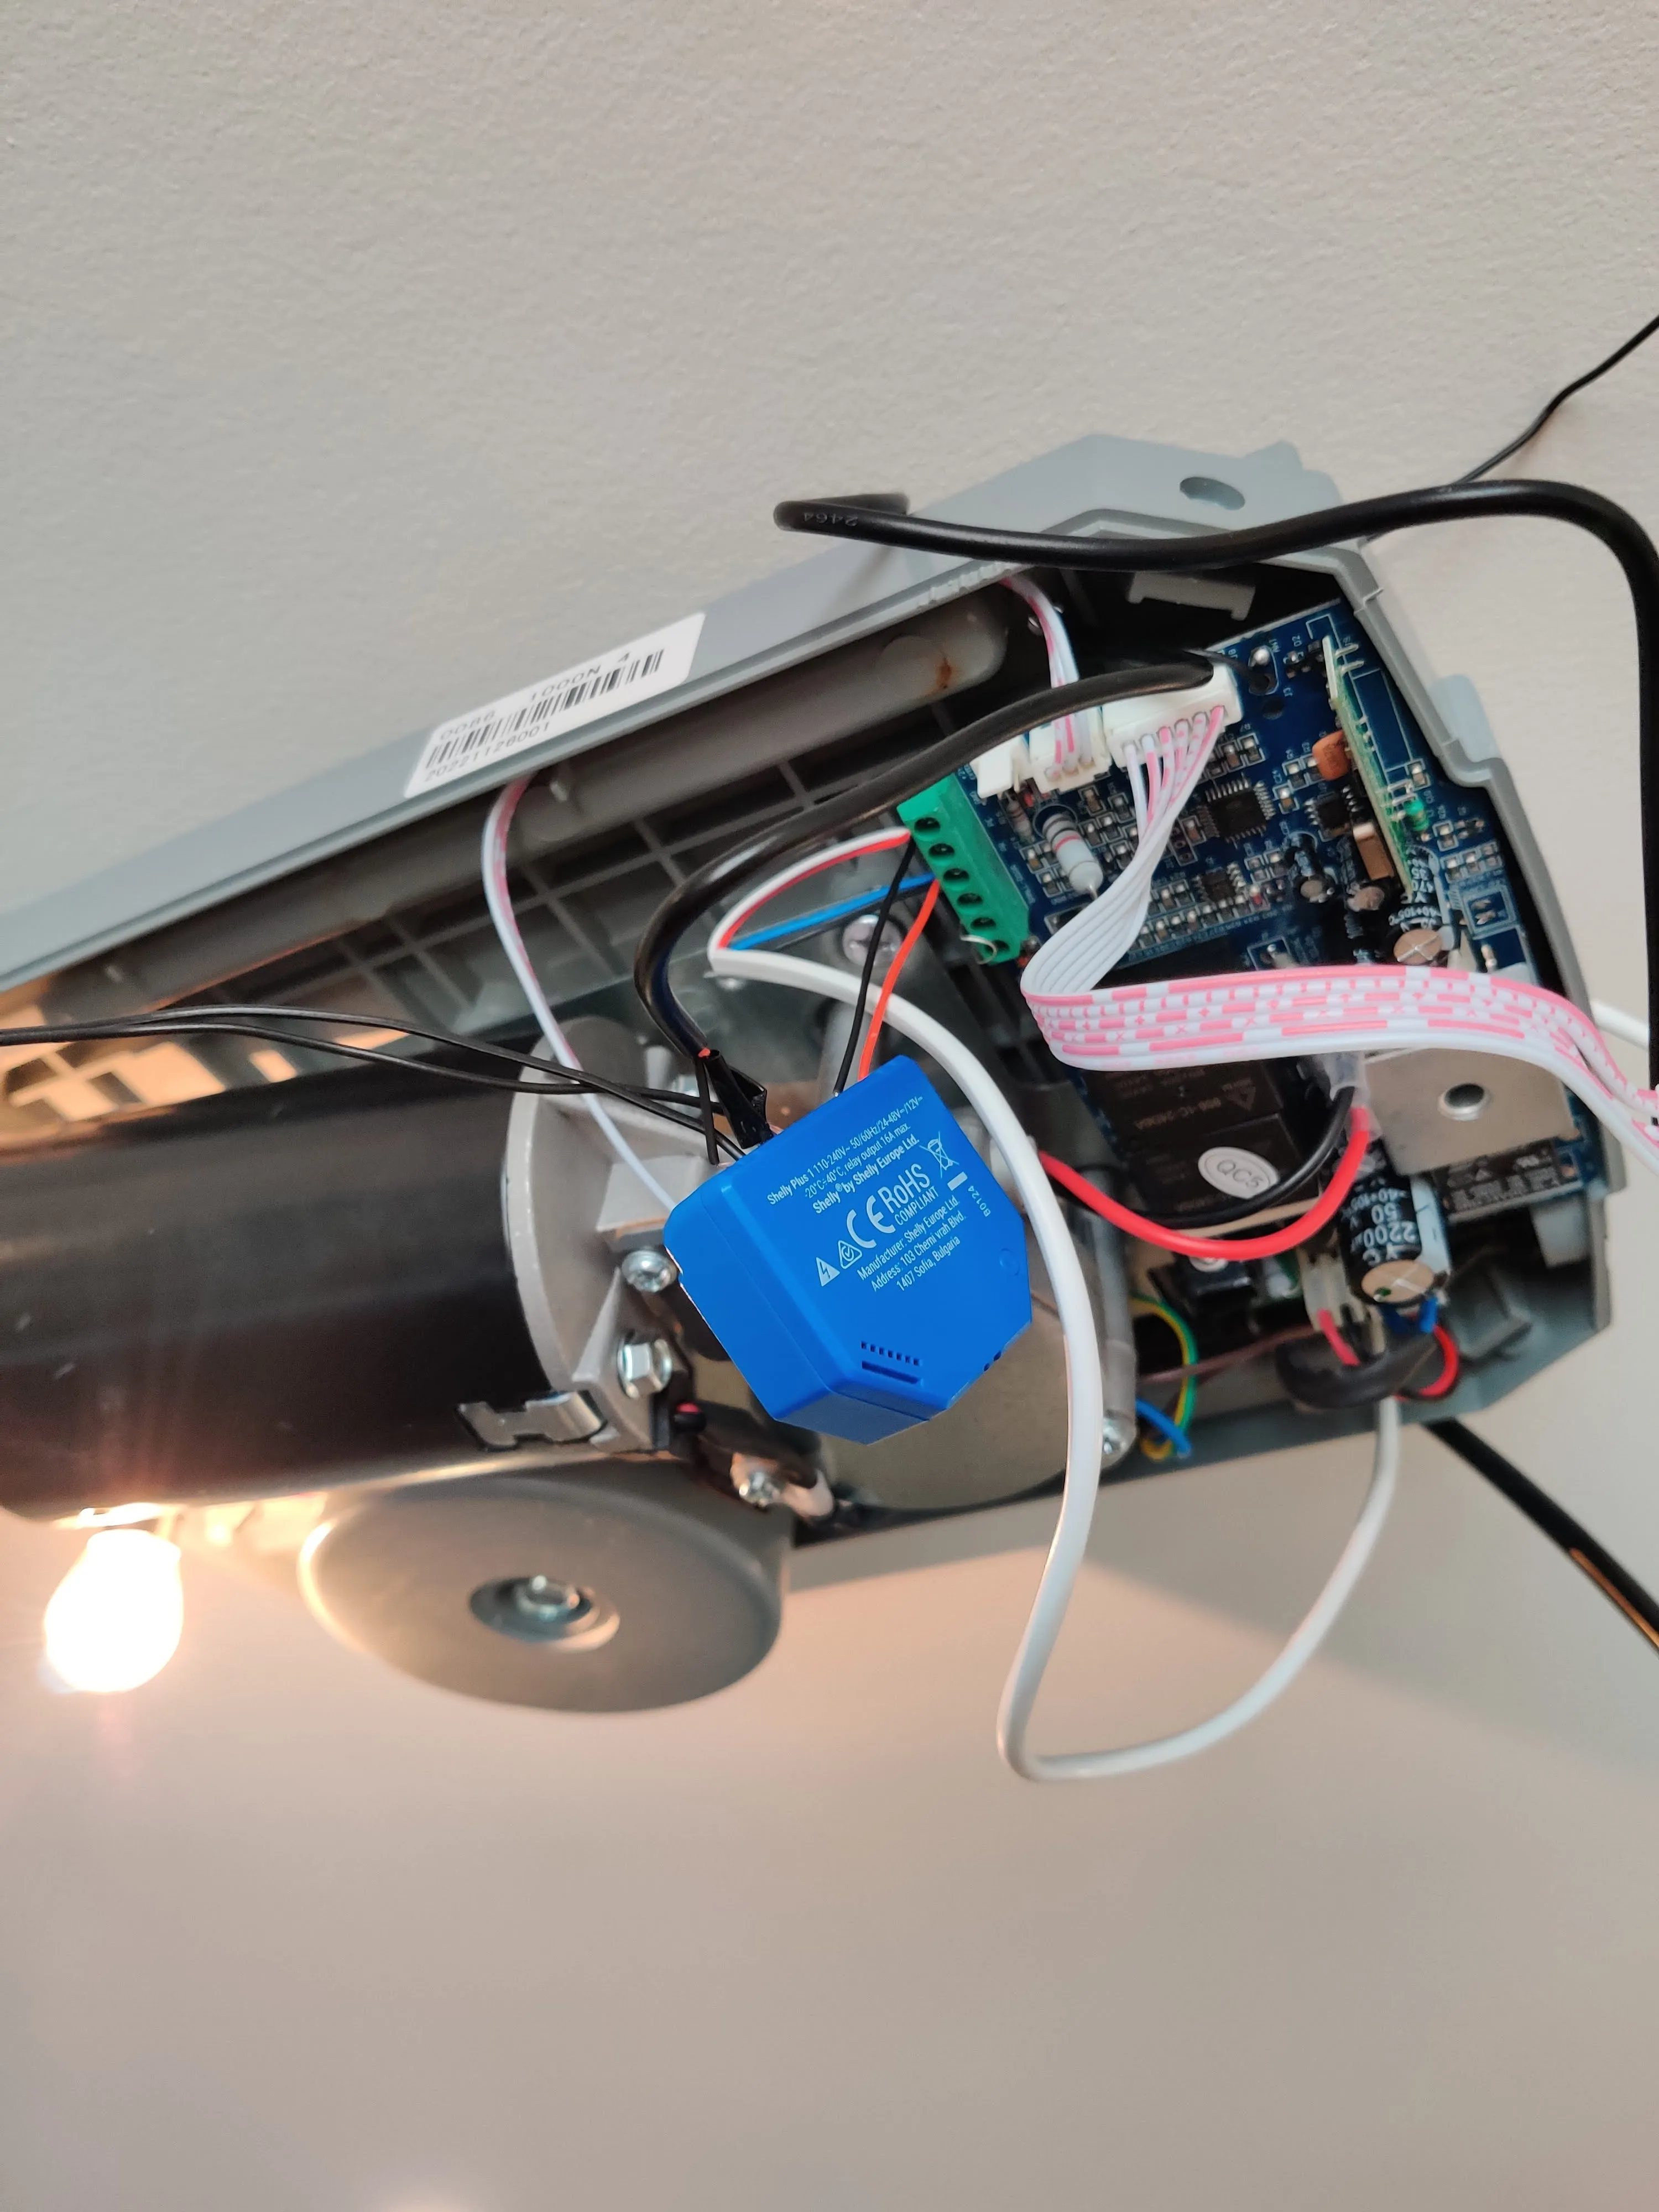
I was a little concerned before taking off the GDO cover that I would be having to drill some holes for the wires, but handily the base plate of the unit had some premade holes wide enough for the cables. I made sure to unplug everything (safety first) and slotted the 12v leads through the first hole. I attached the leads to the Plus 1 just like I did on the exploded view on the carpet. I had to let it dangle at this point, but the wires and the attachment seemed solid.
Next, I had to attach the wires for the relay. I took some of the doorbell wire that I had bought for the reed switch, cut off about 3cm worth and stripped the ends, then attached one side of each to the shelly and the other to the same terminals that the wire from the wall lead to. I don’t think it matters which side goes where, so I just attached it as made sense with the physical layout.
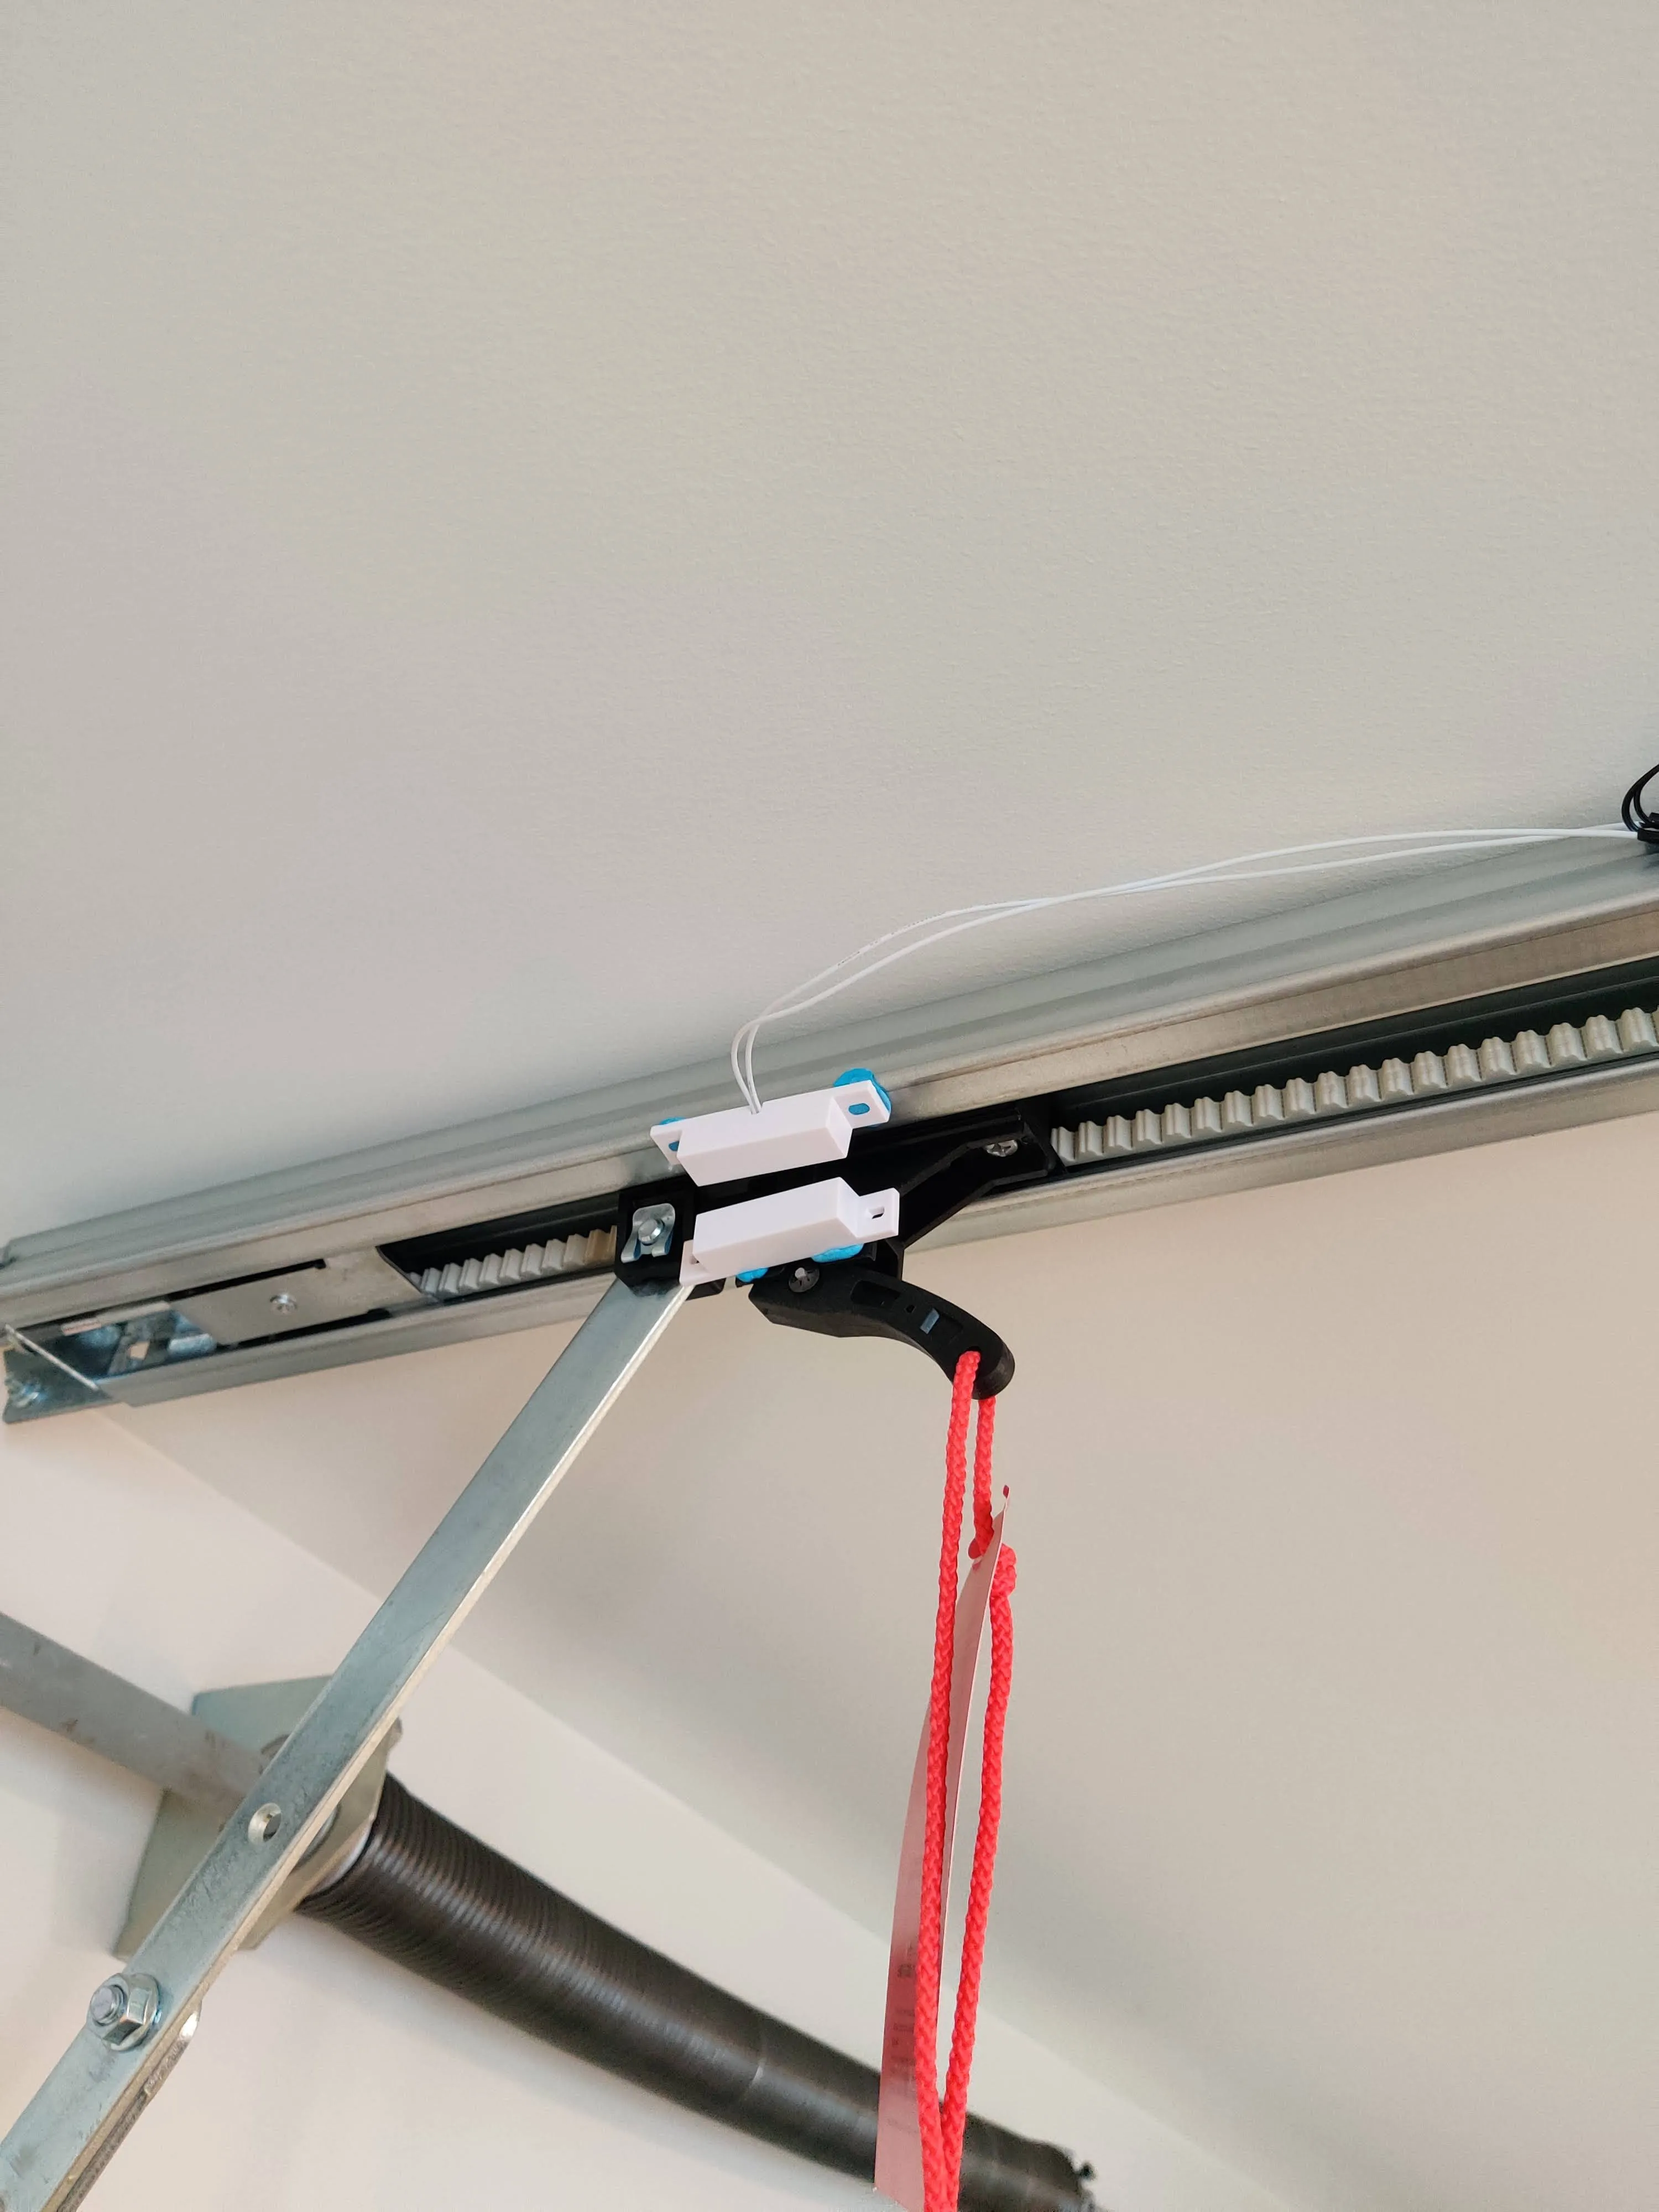
From there, I needed to attach the reed switch wires in and run the switch out along the door belt track. It would have been simpler to attach the switch in closer to the opener unit and save running all that cable out along the track, but doing it like that has a small flaw. Since the switch would be attached close the GDO unit, it would mean that the switch is only triggered when the magnet attached to the track runs all the way to unit when the door is fully opened. Since the door should really counted as open at any point before it is fully closed, attaching the switch so close to the GDO would mean that we would have no idea if the door was completely closed or 90% open.
Shifting the reed switch to the end of the door track means that the switch is closed only when the door is fully shut, so if it is 10% open or 100% open, it registers as open. This is better for security because now we can be confident that when the switch says it is closed, the door is actually closed.
To run it out along the door chain track, I used the doorbell wire. After running one end into the GDO unit and attaching it to the correct terminals on the shelly, I ran the other end out to where the track head attached to the door at the fully closed position. Once I worked out roughly the correct length, I cut the wire and attached it to the switch wires. This was a bit shoddy, since I didn’t have a soldering iron or proper connectors and just wrapped the wires around each other and covered with electrical tape, but since I don’t expect it to be moving around at all, it should hold up okay. That being said, you should always joing your properly! Don’t do what I do, and frankly, don’t do what I say either - i’m just some guy, what do I know?
I gave the switch a quick test to see if the positions I had chosen would work okay, and if my awful wire-wrapping job would actually work. The shelly happily reported the switch state okay, so I continued. To finish up, I mounted the switch on the track using blu-tac, and mounted the magnet on the track head at 90 degrees with some more blu-tac. With the switch and magnet in place, I worked back along the track fixing the wire in place with even more blu-tac. Surprisingly the end result doesn’t look that terrible - like, it’s not great, but it could definitely be worse.
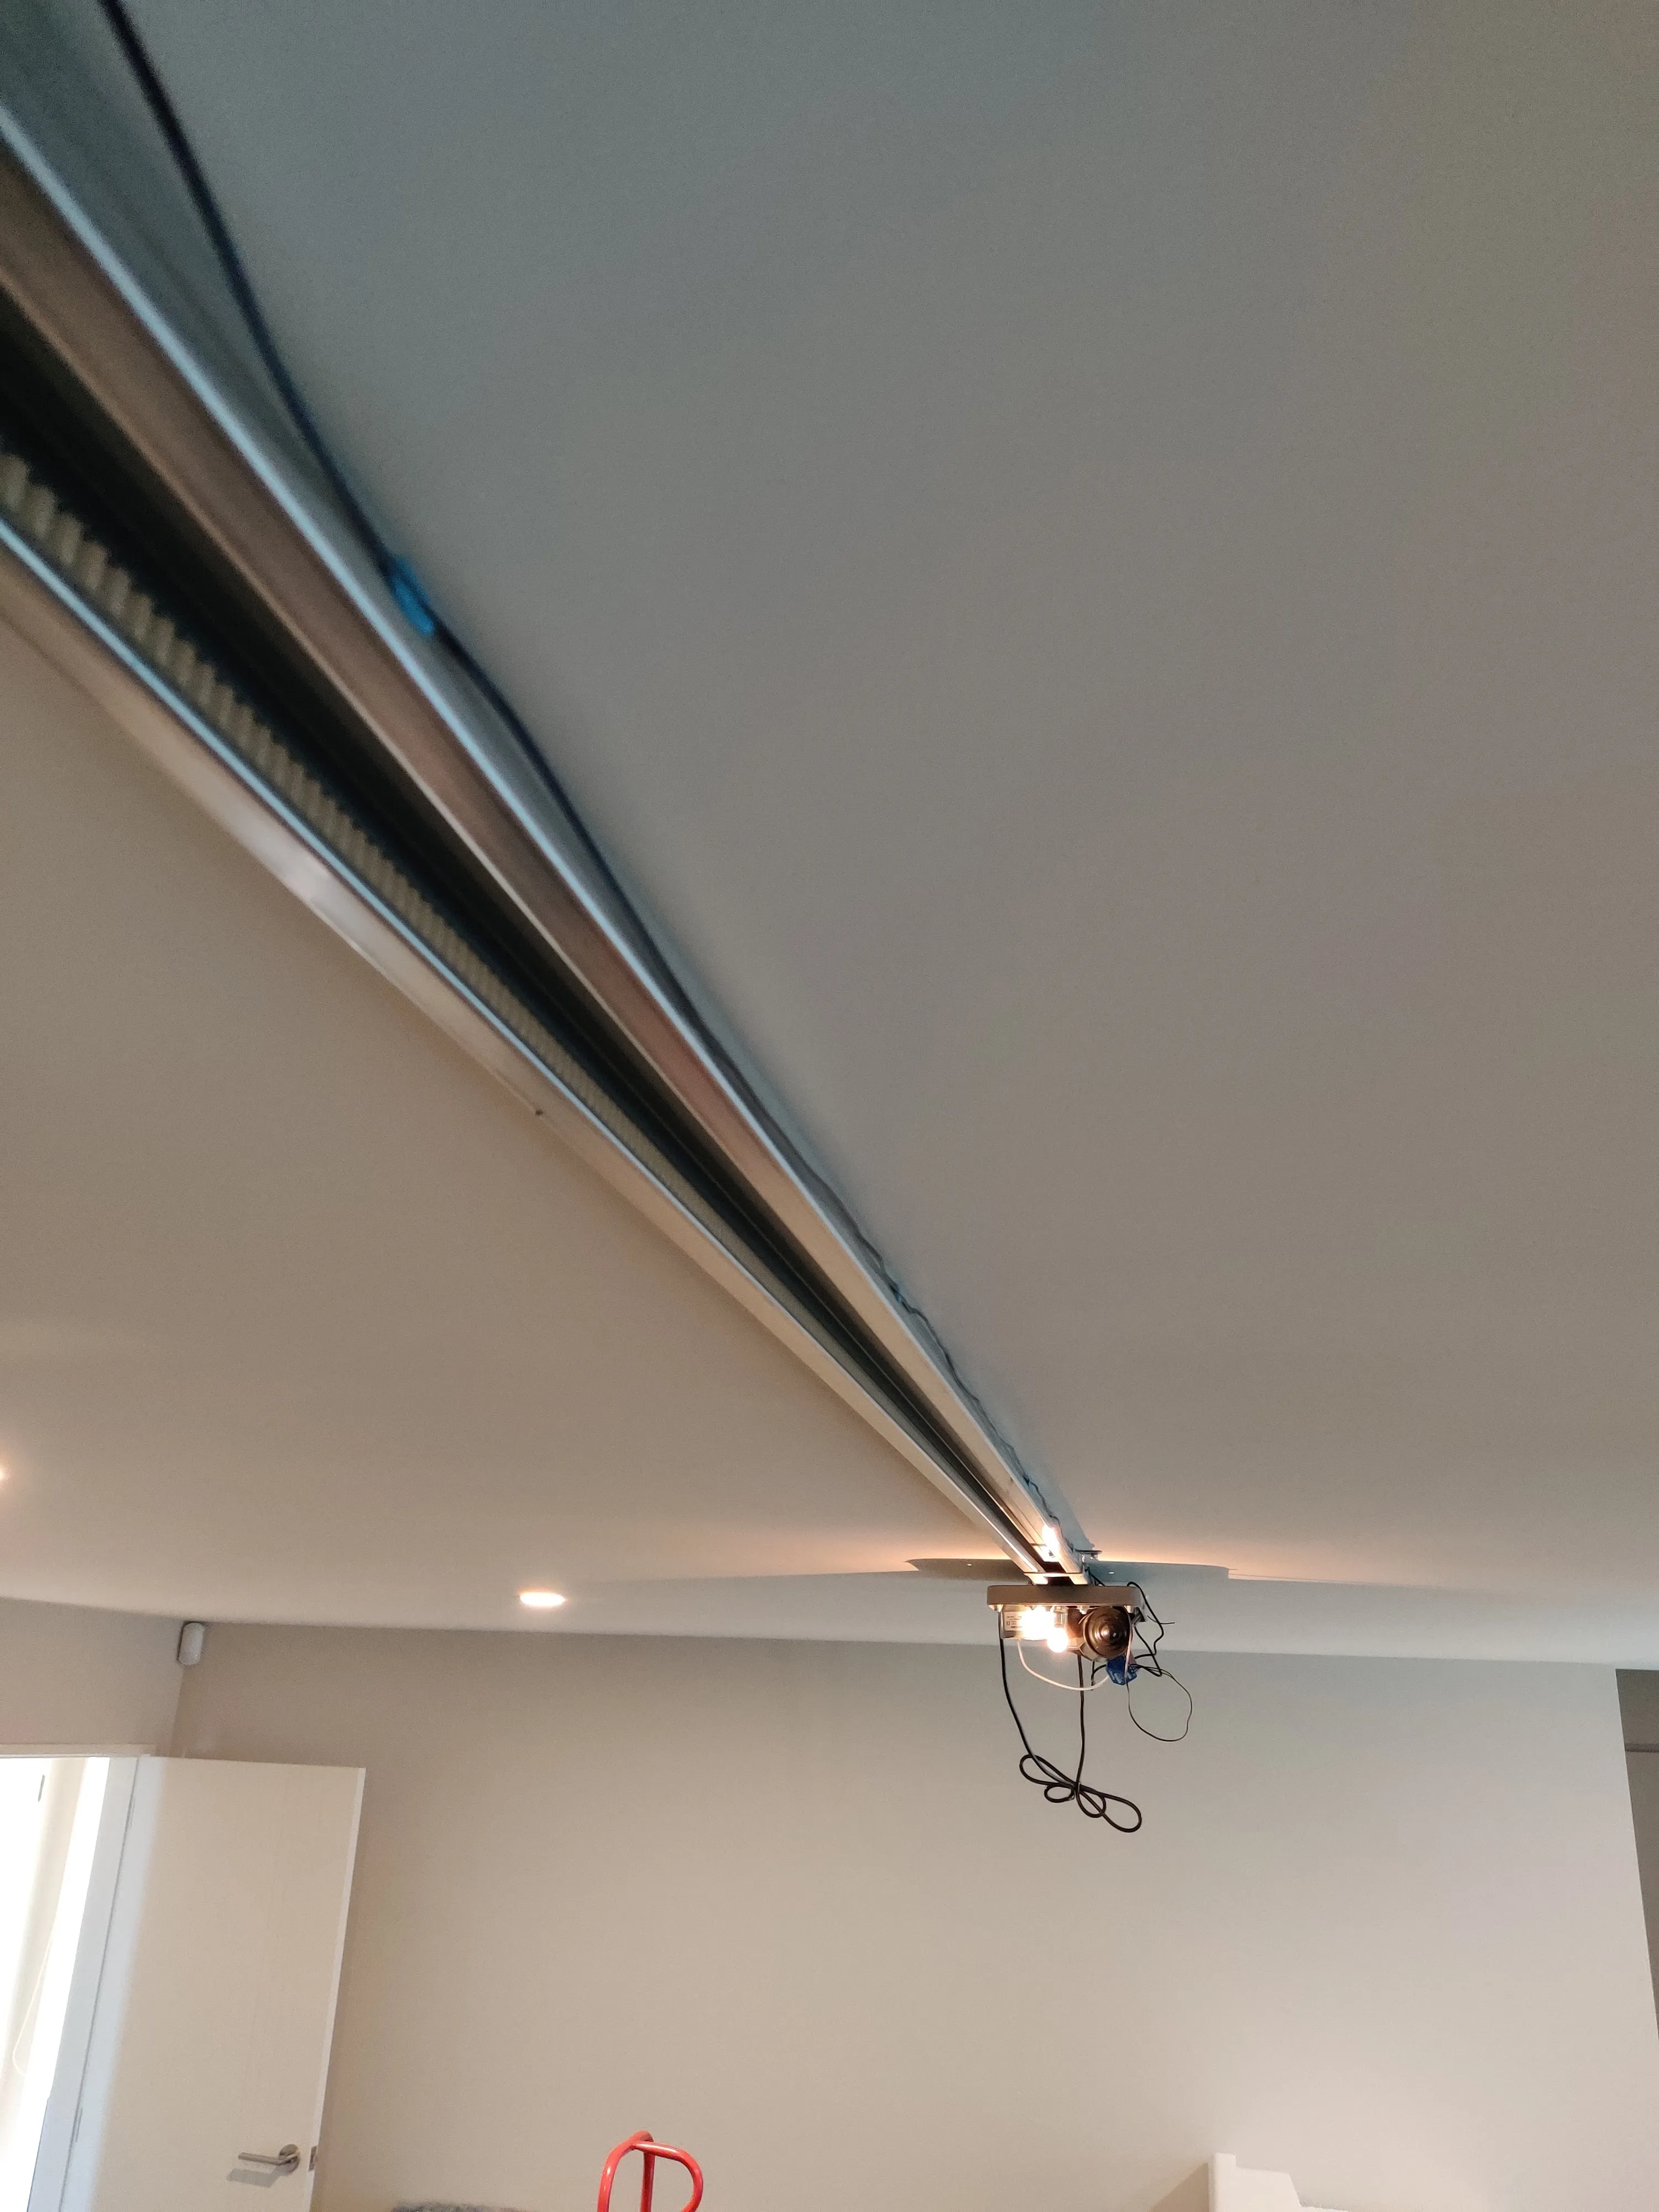
The final product
With everything in place, the only left to do was test it out. Clicking the button in the shelly app, the door opened! The switch reported that the door state had changed from closed to opened. Everything worked!
I went ahead and closed the unit back up, tucking the shelly up into the casing in its new home, and tidied up all the cables on the outside.
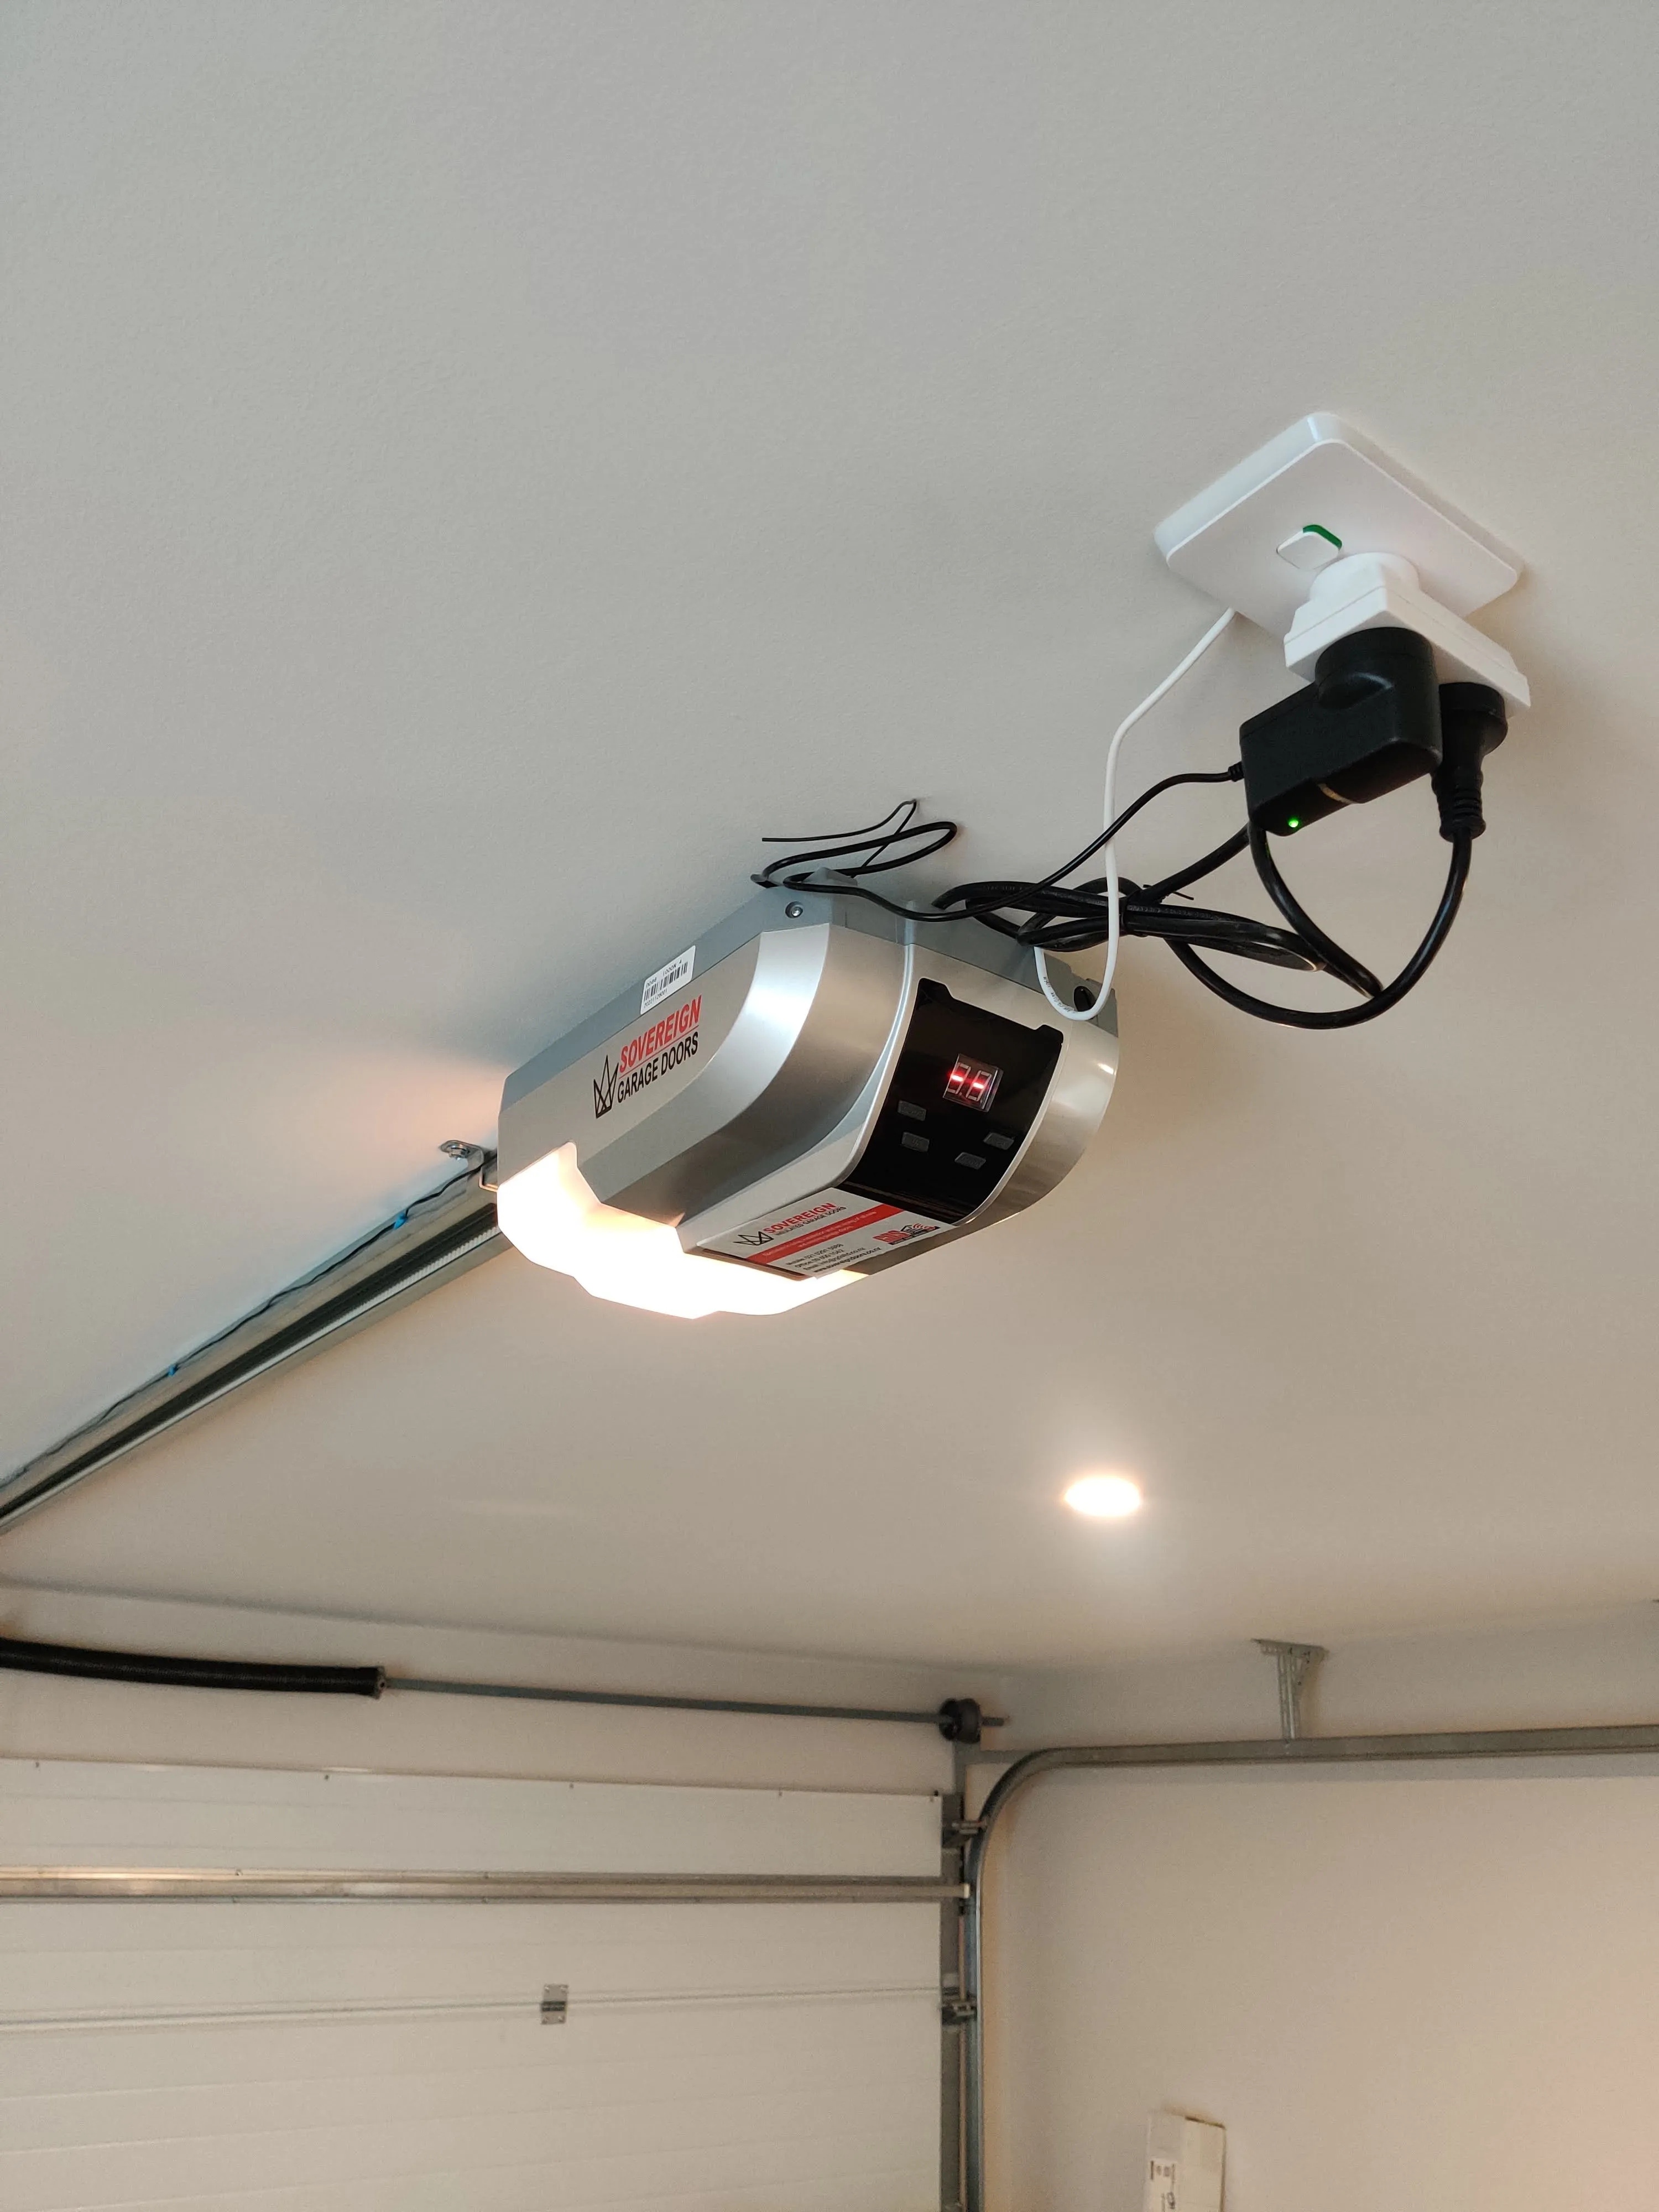
Great success!
Q and A
What kind of reed switch do I buy?
Reed switches like the one I used come in two different configurations: normally-open and normally-closed. Normally open means that the switch is open when the magnet is close by, which means that it will not conduct electricity without the magnet being right next to it. Normally closed means the opposite, and it will not conduct electricity when the magnet is present. The type I bought were normally open, which means that when the magnet is present, the switch is closed and not conducting electricity, while when the magnet is not present it is.
While the normally open switch still works, it means that you need to invert the switch state in the shelly settings for it to match the actual state of the door. You want the switch to be reporting as ‘closed’ when it is closed, and since the switch is actually active when it is closed, you need to invert it for it to make sense
Having a 12v adapter is annoying, can I juse use AC from the opener?
Techincally yes, but I would recommend strongly against it if you’re just starting out like I am. The shelly does allow you to use a 110/240v power source if you wish, but this is much more dangerous as a beginner. I think using an AC source will push the higher voltage AC down the switch wires, which means that you will be electrifying the switch with a much more dangerous power source were a fault to ever occur. Your risk of death or injury or causing a fire is MUCH higher. I would stick to 12v unless you really know what you’re doing. But if that’s you, you probably don’t need to be reading this post.
Closing thoughts
To go one step further, you can tie the shelly into homeassistant and automate the door to open. I now have it set to automatically open when I arrive home from work.
All in all, this is a pretty great project to get someone started with home automation, since it requires no soldering (unless you want to do a proper job), not much in the way of things to buy and is fairly safe if you stick to low voltage.
I would definitely recommend giving it a go yourself if you’re interested!
Footnotes
-
These things are great. They’re small, relatively cheap and pack a bunch of options into a nice little package. I would definitely recommend them for anyone looking to get started with home automation. They can even act as a bluetooth proxy! ↩
-
Chamberlain openers use a wireless button with an encryption scheme, even for the wall switch. This makes wiring in a relay impossible. If you have a Chamberlain opener, see this site for a workaround: RATGDO ↩
-
I later learned that power supplies are not all uniform with the colours, and its safest to test the terminals with a multimeter to work out which end truly is positive. But happily there was no magic smoke when I tested, so it worked out okay this time. You can also get proper DC barrel connectors you can use instead of cutting the power supply cord, but I didn’t know that at the time and cutting the wire worked just fine. ↩